I am in the process of building my first raised bed vegetable garden. One of my goals for 2011 is to eat fresh foods – especially fresh fruits and vegetables. I am in the alpha-stage of planning the garden, and I thought it might be beneficial to track my progress, from start to (hopefully successful) finish.
I plan to grow strawberries, cucumbers, zucchinis, watermelons, cantaloupes, butter beans, and (maybe) some potatoes. I have spoken to a few local gardeners about when to plant each crop, how deep the soil needs to be for each crop to grow, and how to protect the crops from various animals and pests. This will be the first time I’ve ever grown a garden – of any kind – so I’m excited.
The weather here in Georgia has been unseasonably cold. In fact, some are reporting that it might be the coldest winter ever. Instead of waiting for the warmer weather to arrive, I’ve done my best to get ready for planting. So far:
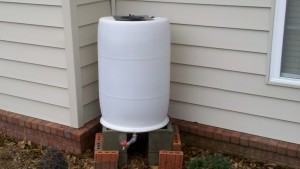
I built a rain barrel to capture and store runoff from the roof of our house.
The rain barrel works like a charm. It takes very little rain to fill it up. I have another old barrel that I need to convert, so that I can have two rain barrels. The water that the barrel collects is free for me to use – and the barrel itself was free, too. The spigot, the pipe, and the other components for completing the barrel cost roughly $16.
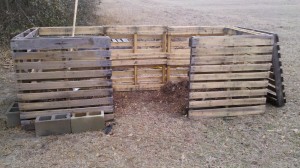
I built a compost bin for storing yard waste and compost.
The compost bin is made from old shipping pallets – which were free from a friend. I have been putting leaves, straw, and food scraps (no meat products) from the kitchen in the compost bin. I initially built just the u-shaped section on the left, but soon added the other u-shaped section on the right, and connected the two. I am brand new to composting, so I’ll let you know how it works out.
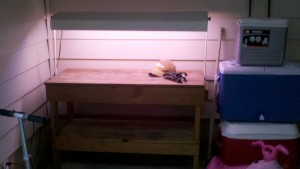
I brought home a free potting bench.
I have wanted one of these for years. My Dad was working and found this old potting bench that he didn’t need. I brought it home a couple of days ago, cleaned it up a bit, and I can’t wait to use it. My favorite feature is the affixed light, which can be adjusted, up-and-down, and also pivoted, forward-and-back. It’s just the right height for mixing soil and potting plants. Again, it was free!
I gathered up scrap lumber to be used in the construction of the raised beds.
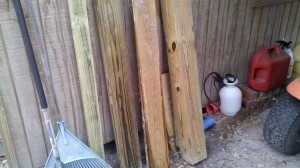
The lumber you see in the picture represents only a portion of the wood I gathered up. I haven’t quite decided on the layout of the garden, but I’m pretty sure that it will be influenced by just how much free lumber I can scrounge up. I don’t know if you can make it out, but there’s a really nice six-by-six piece, on the left-hand side of the picture, which I have some interesting plans for.
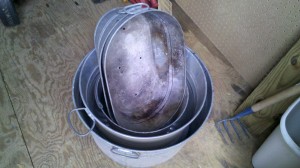
I brought home a collection of old galvanized buckets with the potting bench.
Some of these have holes in them, and will most likely be used as planters (not for vegetables, but for flowers on the back porch). The others are just the right size for mixing and carrying soil and amendments. I have three kids and they’ll get a kick out of mixing stuff up in the various buckets. Again, these were free.
I already have an assortment of tools for working in the yard. Right now, my plan is to build two or three raised beds, each roughly ten feet long and three feet wide. I’ll also build a strawberry-pyramid for planting strawberries. Again, I’m still in the planning stage – but spring is fast approaching – so I’ll finalize my plans in just a few days.
So far, I’m out a total of $16 – the cost of the fittings for the rain barrel. It will be interesting to see if I can save money buy growing my own fruits and vegetables. Even if I don’t, it will be fun to be outside, working in the soil.
I’ve had raised bed gardens for the last 2 years, with mixed results. The best thing I ever did for my garden was put in a drip irrigation system. It makes for easy, consistent, even watering. It was pretty simple to set up – you can pick up a free booklet that explains everything at a Home Depot, or download it on the website http://www.dripirrigation.com. (Although there are other companies and sites where you can get materials, I used this one.)
OK, I’m jealous. I just reread my copy of “Square Foot Gardening” and I want to get started. But inertia being what it is, and given that it is currently raining. . .
Grace! I’ve just finished that book, too. I can’t wait for this cold weather to pass…
-NCN
Hey thanks for adding those pictures. I’ve been meaning to try this and I think I will this summer. I always see those strawberry and blueberry stacks at home depot everytime I go in. I like that you made your own compost bin as opposed to buying one, I think my brother paid over $100 for his and it melted a bit because there was so much heat!
interesting post.i think home gardening is a very interesting activity.it needs some creativity to maintain a good home garden without spending more cost.in your post square rood gardening is very interesting topic.i would like to get start the above activity in my home.